Tramping cooking gear...what I use
I thought I would do a post about the cooking gear I'm currently using. I could be an total outdoor tech head and call this a "cooking system" except "system" implies some planning while this gear simply coalesced over time.
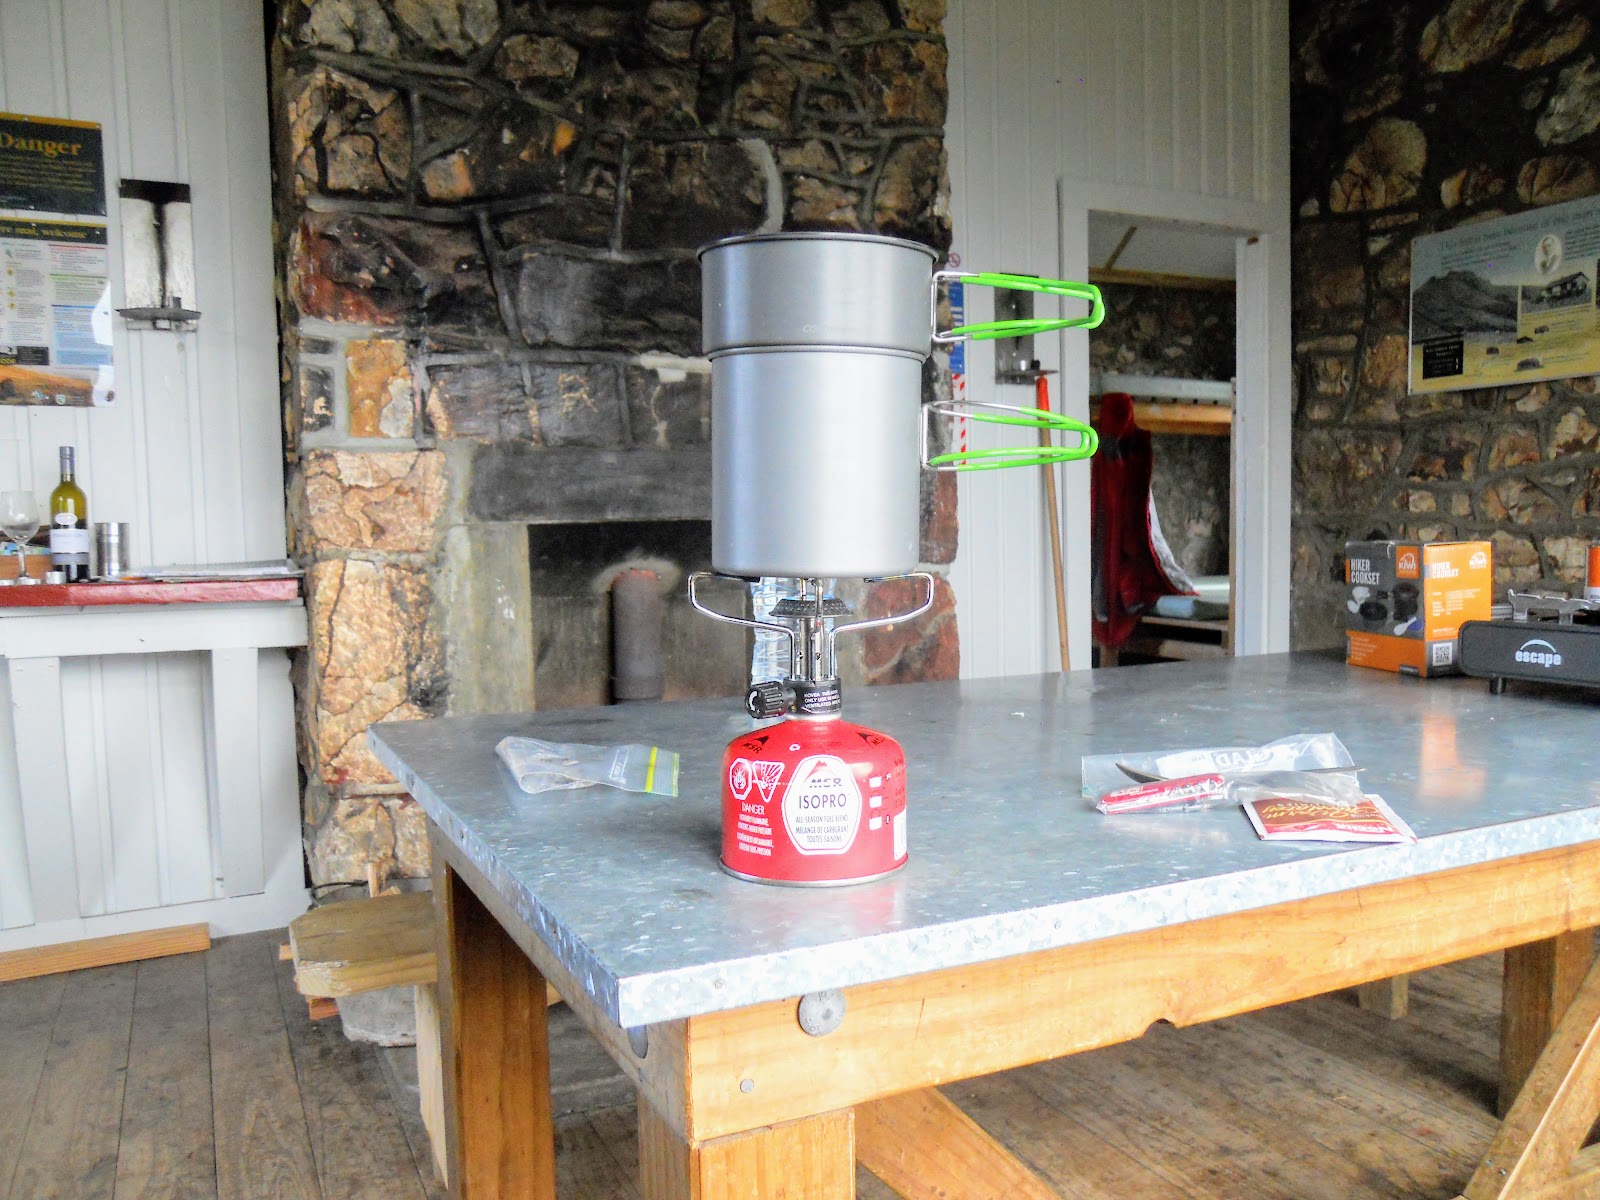
 |
| Having a brew at Davies Shelter on the Queen Charlotte Track 2016 |
How your tramping style impacts on your gear
It is a waste of time talking about cook gear without a brief discussion of tramping styles.
Obviously, the style of tramping you follow is going to dictate the type of cooking equipment you are carrying. We can break these down into two main styles: traditionalist and lightweight
If you are a traditionalist you may carry some real food, a white spirit stove, larger pot(s) and possibly even a skillet. If you are an ultra lighter you will have a meths stove, one spoon/spork and a small titanium pot (if that, many have started to cold cook i.e. NO hot meals or hot drinks when on trail!)
 |
| Not lite weight....a more traditional set of gear for tramping |
Obviously, the style of tramping you follow is going to dictate the type of cooking equipment you are carrying. We can break these down into two main styles: traditionalist and lightweight
If you are a traditionalist you may carry some real food, a white spirit stove, larger pot(s) and possibly even a skillet. If you are an ultra lighter you will have a meths stove, one spoon/spork and a small titanium pot (if that, many have started to cold cook i.e. NO hot meals or hot drinks when on trail!)
 |
| East Hawdon Hut, 2015...my old cook pot and aluminium cup in use |
Obviously, you should only carry what is absolutely essential to get the job done, nothing more.
My style is constantly evolving, at present I am half way towards ultralight, gradually changing kit as I go. I'm also pragmatic about this, sometimes adding a small amount of extra weight makes cooking easier or more pleasant. I'm not one of the "cut off the handles just to save weight" types.
I don't carry a plate or bowl, instead I eat from my cook pot or straight from the bag.
I still occasionally cook in my pot but the majority of my cooking is heating water to add to dehydrated and freeze dried meals. That and copious amounts of tea of course....
I don't carry a plate or bowl, instead I eat from my cook pot or straight from the bag.
 |
| Me tucking into a BCC Tomato Chicken Alfredo straight from the bag! |
I still occasionally cook in my pot but the majority of my cooking is heating water to add to dehydrated and freeze dried meals. That and copious amounts of tea of course....
A look at my cooking gear
Because of my tramping style I need very little cooking gear. Here is a list of my cook equipment including everything needed to prepare my typical menu items:
Cook pot, hard anodised aluminium 1 120gms
Cook pot cup/lid 1 80gms
or: Toaks Ti 1300ml pot with lid 1 90gms
Kovea Hiker stove, steel + bag 1 140gms
or: Firemaple FMS-116 Ti 1 48gms/76gms with case
MSR 300gm gas canister 1 227gms
Titanium Fork 1 18gms
Titanium spoon 1 21gms
Victoronix knife (including the 'biner) 1 89gms
Bic lighter 1 30gms
Chux cloth 1 12gms
Nylon stuff sack 1 75gms
Total weight 822gms or 620gms
If you take away the fuel canister that is around 600/420gms which is pretty good weight wise.
I have all my cooking kit together in a nylon stow bag, if I stop and want to brew up I have everything readily available in the one place. This includes my tea bags and sugar substitute (more on that later), it is so much easier looking for the one blue bag than searching for gear in 2-3 different places.
I have all my cooking kit together in a nylon stow bag, if I stop and want to brew up I have everything readily available in the one place. This includes my tea bags and sugar substitute (more on that later), it is so much easier looking for the one blue bag than searching for gear in 2-3 different places.
 |
| My tramping cook gear packed for my next tramp...a nice neat package! |
 |
| Tramping cook equipment laid out for viewing |
I use the Chux cloth as a tea towel to dry my pot etc., I have one with the cook kit and add another to every second days worth of food. This system works well and allows me to leave cleaning cloths at huts if they need them.
I usually have a 2x2cm square of scrubbing pad in a small plastic bag inside the kit for cleaning my cook gear. My bio degradable soap is carried separately in an outside pocket of my pack.
 |
| Cook gear: A Chux cloth and lighter but no pot scrubber! |
 |
| Some nylon non scratch pot scrubbers... |
 |
| Sea to Summit super wash: biodegradable camp soap |
I carry a spoon, knife and fork; many people make due with just a spoon or a spork (spoon and fork combined) but over time I have found it is more practical to carry light titanium versions of all three. My pen knife (classic Victorinox camper) is the only knife I carry because the only thing I ever need to cut is salami, cheese and vegetables.
There is a small carabiner to keep them clipped together.
If I need a huge knife for carving a club, hut or rescue vessel then something has gone seriously wrong and its too late already!
 |
| Cook gear: knife, fork and spoon (KFS) |
One of my cook stoves is a Kovea Backpacker model which I mainly hold onto out of sentimental attachment. It is heavy at 140gms (including the bag) but I brought it in 1993 and have been using it ever since with no problems. Rest assured, I'm not that much of a sentimentalist: if it didn't perform I would replace it, as I have done with a lot of my tramping kit.
 |
| My Kovea backpacker model camp stove and carry case |
I also like the wide burner head (a lot of the newer lightweight stoves have very small burners) and long pot support arms it has. It seems a lot more stable than some of the super lightweight stoves I have seen in use.
This is "olde school styles" i.e. no piezo starter, you have to use a match or lighter to fire it up, this is no disadvantage in my opinion. This stove has seen some real use, still works like new!
Kovea is solid gear, at least the old stuff is.
 |
| A Kovea Backpacker stove in operation... |
In early 2018 I brought myself a new lighter titanium stove, it is a Chinese brand called Fire Maple, the code for it is the FMS-116T. It has survived a couple of outings now and I am impressed...it works really well. It only weighs 48gms (76 gms in the supplied carry case). It is super efficient and has a wide burner head and cost me $50 from the online retailer Gearshop.
This is my main stove now.
 |
| My new Firemaple FMS-116Ti stove |
In the photo below, my cook pot has the MSR gas canister inside, as well as my brew kit of tea bags, lighter and Splenda sugar replacement. Not shown are the supply of water purification tablets I carry in the kit so I can make potable water without needing to hunt through my pack.
 |
| My cooking pot and ancillary gear packed ready for the carry bag |
The pot above is a Element brand1 liter hard anodized aluminium one with folding handles, the lid/cup is made of the same material. I have recently brought a Toaks Titanium cook pot as I continue to lighten my gear. This is a 1.3 liter pot and weighs a mere 90gms including the lid. The Toaks pot is much lighter and given I mostly just boil water it fills its role well.
I tend not to carry the supplied bag as it just adds to the weight, instead I wrap the pot in an old bread bag as these are light, waterproof, disposable (as a trash bag) and easily replaced.
 |
| My newer Toaks Ti 1.3 liter cook pot and carry bag |
 |
| Close up view of the Toaks 1300ml Ti pot |
 |
| My Toaks Ti cook pot in use on the Abel Tasman Inland Track, March 2018 |
Both of these pots have a measuring scale up the side in cups and 200ml graduations.
The bread bag is what I use for rubbish collection, I usually hang it from one of my rear facing pack straps while I am walking. One bag will usually last me for a 3 day tramp.
I also carry 3-4 small freezer bags for storage purposes; like keeping my KFS off the grotty hut benches etc.
The bread bag is what I use for rubbish collection, I usually hang it from one of my rear facing pack straps while I am walking. One bag will usually last me for a 3 day tramp.
I also carry 3-4 small freezer bags for storage purposes; like keeping my KFS off the grotty hut benches etc.
 |
| Cook pot and the gear held inside it |
The cup/lid/frypan/plate of this kit will hold about 450ml of liquid, it fills all four stated roles as required.

Originally these heaters were developed for the US military in the late 1980's to heat their MRE meals. An MRE is a single meal with an entrée in a therm-stabilised retort pouch, a Flameless Ration Heater (FRH), various snacks and an accessory pack.
The FRH's are excellent for the defence services as they do away with the need for fires, cookers or other obvious cooking methods.

The salts in a FRH are activated by water, you chuck your retort pouch in with them and viola... one heated meal. No mess, no fuss but horribly disastrous to the environment.
These are good with anything in a metallised or thick plastic retort pouch, such as the Back Country range, Kaweka meals and the MTR Indian curries.
Just handle the pouch carefully when heated as they are goddamn hot!
Esbit produce solid fuel tablets made from hexamide, I usually carry a couple as an emergency heating options or as a fire lighter. These burn long and at a medium heat so they are best used for heating water for dehydrated meals. Two tabs weigh a minuscule 30 gms!
You can also buy special stoves to use these tablets on but I usually just find two flat rocks, light the tab and perch my cook pot over the flame. Works a real treat!
It is well worth considering this alternate: recycled bottles are cheaper, lighter, easier to replace and the recycling is good for the environment.
My criteria for potential bottle sources are:
Must be less than 100gms empty
Easy to replace
Wide mouth on bottle, 1+ litre capacity
Made of a food grade or non BPA plastic
Easy to remove any labels for ease of cleaning
What I have been using for the last three years are Fresh Up juice bottles, these tick all my boxes and I even like the juice they contain when new. These weigh 70gms empty compared to 175 for a medium sized Nalgene bottle.
Set up for use is easy, strip off the label, wash them and fill them with water. Simple!
Teabags of course...too much hassle to use leaf tea, lots of mess, cleaning problems etc. With a teabag you chuck it in your cup, add sugar and water and Bob's your Uncle...
I used to carry sugar for tea but it is very heavy, so I switched to a sugar substitute. Splenda is the tastiest sugar substitute I have found, it doesn't have that bitter after-taste others have.There are 200 tablets per pack, the total weight is a minuscule 12 gms!
Ancillary Gear
Flame-less Ration Heaters
The other heating method I sometimes use is one of the Back Country flame-less ration heaters, these produce heat through thermo-chemical action to warm your food.
Originally these heaters were developed for the US military in the late 1980's to heat their MRE meals. An MRE is a single meal with an entrée in a therm-stabilised retort pouch, a Flameless Ration Heater (FRH), various snacks and an accessory pack.
 |
| A US military grade Meals Ready to Eat (MRE) |
 |
| Contents of a US MRE pack: Chicken, vegetables and noodles MRE |
The FRH's are excellent for the defence services as they do away with the need for fires, cookers or other obvious cooking methods.

The salts in a FRH are activated by water, you chuck your retort pouch in with them and viola... one heated meal. No mess, no fuss but horribly disastrous to the environment.
These are good with anything in a metallised or thick plastic retort pouch, such as the Back Country range, Kaweka meals and the MTR Indian curries.
 |
| Some of the MTR Indian mains I sometimes carry...Panner Butter Masala and Jeeri Rice |
Just handle the pouch carefully when heated as they are goddamn hot!
Esbit cubes
Esbit produce solid fuel tablets made from hexamide, I usually carry a couple as an emergency heating options or as a fire lighter. These burn long and at a medium heat so they are best used for heating water for dehydrated meals. Two tabs weigh a minuscule 30 gms!
 |
| Esbit brand solid fuel tablets |
You can also buy special stoves to use these tablets on but I usually just find two flat rocks, light the tab and perch my cook pot over the flame. Works a real treat!
 |
| An Esbit solid fuel cooker...this is the famous Tommy Cooker |
Water Bottles
I have long ago given up on using heavy metal or rigid plastic bottles for carrying water in. Instead I use empty juice or water bottles which I refill, and then discard after a couple of months or when they start to degrade. |
| I no longer carry heavy Nalgene style water bottles |
It is well worth considering this alternate: recycled bottles are cheaper, lighter, easier to replace and the recycling is good for the environment.
My criteria for potential bottle sources are:
Must be less than 100gms empty
Easy to replace
Wide mouth on bottle, 1+ litre capacity
Made of a food grade or non BPA plastic
Easy to remove any labels for ease of cleaning
What I have been using for the last three years are Fresh Up juice bottles, these tick all my boxes and I even like the juice they contain when new. These weigh 70gms empty compared to 175 for a medium sized Nalgene bottle.
 |
| Fresh-Up Juice bottle = instant water bottle |
Set up for use is easy, strip off the label, wash them and fill them with water. Simple!
 |
| Juice bottle re-purposed and ready for the field |
My Brew Kit
When I am out tramping I drink tea for a hot drink. I prefer Dilmah Earl Grey but anything is acceptable if I am running short of supplies. I usually have a brew with breakfast, occasionally one at lunch and 1-2 at the end of the day. |
| Delicious Dilmah Tea: and its ethically grown as well... |
Teabags of course...too much hassle to use leaf tea, lots of mess, cleaning problems etc. With a teabag you chuck it in your cup, add sugar and water and Bob's your Uncle...
 |
| Tucking into a brew at East Hawdon Hut, 2014 |
I used to carry sugar for tea but it is very heavy, so I switched to a sugar substitute. Splenda is the tastiest sugar substitute I have found, it doesn't have that bitter after-taste others have.There are 200 tablets per pack, the total weight is a minuscule 12 gms!
One tablet = 1 teaspoon of sugar
I am aware of the controversy about these sugar substitutes but given that I only use it for 20-30 days a year or less I figure I'm probably o.k.
 |
| Splenda sugar replacement..it tastes o.k. |
I have also used sweetened condensed milk as a tea sweetener...it makes for a really sweet, milky but moorish brew. Buy it in the shelf stable plastic tube as they are lighter and can be securely closed after use.
 |
| Delicious Nestles condensed milk....yum! |
I will also occasionally take Latte coffee sachets from Jarrah/Nescafe and also hot chocolate sachets when the weather is cooler.
Isobutane Canisters
I regularly both the small and medium sized isobutane gas canisters, a small one (110gms) will last for 1-2 nights depending on use while the medium version (227gms) will see me for 3-5 days. I only carry the larger canisters (450gms) on extended week long trips.
I usually boil water 3-4 times per day for tea, drinks and meals.
 |
| Three sizes of MSR gas canister |
My favourite gas brand is Kovea, but the MSR version is also good and far more widespread. All of my gas stoves will accept screw on type gas canisters.
 |
| 227ml MSR Isobutane gas bottle |
Most of the loose cook kit fits inside the cook pot; this is good as it is a smaller packed space as well as protecting it from knocks. The stove in its pouch goes into the bottom of the bag with the chux cloth, KFS and scrub pad, then the pot ensemble goes on top. A nice neat package.
 |
| The cook pot with gear stored inside: gas canister, lighter and brew kit |
Stove Wind-shields
One thing which I occasionally carry is a wind-shield to protect my cooker flame from wind gusts. A wind gust can extinguish your cooker or at a minimum make it much less efficient.
I have two different wind-shields, the first is a commercially produced version made by Macpac. This is a fold out screen with connectors so that it can be shaped into a circle. The main problem with this is the weight (110gms) so has been relegated to base camp cooking duty.
 |
| Macpac brand cooker wind-shield |
My other wind shield is home made from an heavy foil roasting tray. This version weighs hardly anything (37gms) and if damaged can be easily and cheaply replaced. There are a set of instructions on Lotsafreshair's website about how to make one of these at home.
 |
| A foil wind shield from http://lotsafreshair.com |
If I'm in a hut or camping in thick bush I don't usually bother with a wind shield or I will make an expedient one from rocks or chunks of wood. I would carry a wind shield if camping out on tops or a ridge as wind is more of a problem there.
Miscellaneous Gear
The other thing I carry is a support for my stove gas canister. These
cooker over gas canister stoves are notoriously unstable, mainly due to
the small diameter of the gas bottle at its base. What a pot support
does is increase the diameter on the ground, making it much more
stable.
 |
| Gas bottle support, Macpac brand |
My version is from Macpac, it will accept all three sizes of canister & weighs 20gms, again it is carried if I expect to be camping out.
Other cook gear I use...
 |
| My previous cook set in use Lake Christabel Hut 2014 |
I used to carry a lightweight stainless steel pot and a separate metal cup but exchanged these for my current set up last year. Stainless is great for clean up but it is a lot heavier.The stainless pot weighs in at 227gms (no lid), the cup weighs 90gms so that is 317gms as opposed to my current 210 gms.
I also have a fry pan made from the same material (they were a set) which weighs only 97gms.
I still use both if part of a larger tramping group or for base camping as you need your own cup etc. and the pot (at 1.2 litres in volume) is much better for cooking real food in.
I also have a fry pan made from the same material (they were a set) which weighs only 97gms.
I still use both if part of a larger tramping group or for base camping as you need your own cup etc. and the pot (at 1.2 litres in volume) is much better for cooking real food in.
 |
| Brewing up on the bed of the Blue Grey River 2014 |
Just one other item I'd like to mention, if you use isobutane gas canisters then like me you will end up with a lot of hard to dispose of empties. Normally these cannot be recycled due to the chance of residual gas causing an explosion so you need to get one of these:
 |
| The Jetboil Crunchit |
This is a Jetboil Crunchit!
A Crunchit is basically a big can opener,...you use it to pierce empty gas canisters. The canister can then be placed in your usual metal recycling bin. They cost $16 NZD and will be one of the most useful pieces of gear you will ever buy. Mine stays at home so that after a trip I can recycle the metal responsibly.
Find them online, at any Macpac/Kathmandu/Bivouac Outdoor/Hunting and Fishing store in New Zealand and at most other good outdoor retailers.
The cook gear in use...
Here are some assorted photos of the current cook kit in action....
 |
| Brewing up at Rod Donald Hut, March 2016 |
 |
| Cooker and cook pot in use, Packhorse Hut 2016 |
 |
| Cook gear boiling water at Mid Robinson Hut, 2015 |
So there you have it, a short introduction to my cooking gear!


