Wednesday, 7 December 2016

To Speargrass Hut: 3rd December 2016

A day trip to Speargrass Hut, Nelson Lakes NP

 This was the second of the two day tramps I did over the weekend and it was simply a hut bagging exercise. I have been down the Sabine Valley before but never walked the whole Travers-Sabine Circuit (...but I will be in April if the augurs work for me...) so I have not visited Speargrass Hut before.


Mt Robert track network map

 The Kerr Bay DOC campsite:

As I mentioned in the last post I stayed overnight at the Kerr Bay camp ground near Lake Rotoiti. This is a very nice DOC camp ground. It has a well appointed cooking shelter with free cooking facilities (lights, potable water, gas hob, hot water heater) plenty of table space and bins for your rubbish. There are about 40 odd tent and caravan sites and all the amenities you would expect. 

It also has token operated hot showers which is a real bonus...get the tokens at the St Arnaud DOC office.

DOC cooking shelter, Kerr Bay camp ground, St Arnaud

Interior, Trampers cooking shelter, Kerr Bay camp ground, St Arnaud

Dining tables, Trampers cooking shelter, Kerr Bay camp ground
 I had a nice flat spot for my tent on the nights I stayed, but it absolutely hosed with rain on the Friday night. I stayed dry in my Coleman tent but it was a "near run thing' as the Duke of Wellington remarked. Everyone was a bit wet and bedraggled looking the next morning at breakfast...

The camp ground was full, mostly tourists but there were a few kiwis as well, there are also two slightly more "rugged" camp-sites at West Bay if Kerr Bay is full.

View up to tent/caravan sites,  Kerr Bay camp ground, Nelson Lakes NP
You can book a site on-line from December through Easter, the rest of the time it is first come first served.

Speargrass Track to Speargrass Hut

When I was in the Army we walked over Waiau Pass and down the Sabine Valley to the old track around Lake Rotoroa. The track around Lake Rotoroa is gone now, wiped out by a big storm about 3-4 years ago. 

As it is only 2.5 hours from a car park I thought it a good candidate for a "baggin's"

Lake Rotoiti from the Mt Robert car park, Nelson Lakes NP
The track is generally flat with a slight rise at both ends and takes approximately 2.5 hours each way, 5-6 hours return.They are relatively easy hours as well.

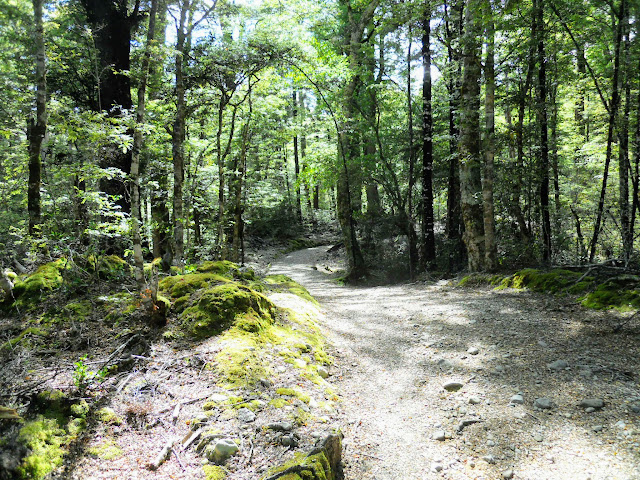
Track to Speargrass Hut, Nelson Lakes NP
The start point for the Speargrass Hut Track is the Mt Robert car park. This is also the start point for the trip to Angelus Hut and the Mt Robert Circuit. The views are nice as it sits just below the 900 meter line. 

The car park was already half full when I arrived at 08.30 I would imagine most were either overnighting at Angelus or Bushline Hut or walking the Mt Robert Circuit.


A full Mt Robert car park, Nelson Lakes NP


Note: Don't leave your car here over night! This is the site of more car break-ins than any other area of New Zealand bar South Auckland. I'm exaggerating a bit but not by much. This car park is specifically excluded on some insurance policies used by the car rental companies.

Basically, you need to park in St Arnaud, the best spot is outside the DOC Maintenance HQ near the visitors centre.


Day shelter and toilets at the Mt Robert car park, Nelson Lakes NP
There is a shuttle service during the summer to the car park, I think prices are around $20 per person.

 
DOC track sign at the Mt Robert car park


Closer view of the DOC track sign at the Mt Robert car park

Map of the local track network around Mt Robert and the Travers-Sabine Circuit
As I said, this is the starting point for both the Mt Robert Circuit and Speargrass Tracks. My track headed off to the right around the flank of Mt Robert ridge. The track sign doesn't specifically say 'this way to Speargrass" but that is the way to go. It is a very nice beech forest track, initially dropping down to Speargrass Stream and then gradually climbing to the tussock flat the hut sits on.


Start of the Speargrass Track at Mt Robert car park


At the start of the Speargrass track
This track is all about root ladders and side streams; there are a lot of both to walk over. All of the side-stream have small foot bridges the exception being the river crossing near Speargrass Slip (more about that later). The track is a bit up and down but easy to follow.

One of the many sidestreams you cross on the Speargrass Track
After an hour or so you descend right down to the bank of Speargrass Stream, the track follows the river for a good kilometre with a river crossing or flood track diversion near the infamous Speargrass Slip.

First view of Speargrass Stream from the Speargrass Hut track

The river doesn't look too bad in this photo but brother was it deep and swift, I took a good hard look and thought "NO, bugger that for a laugh"! The pools in the river would be 4 feet deep and the water was whipping along and then under a series of nasty looking snags just hungering to drown somebody. 
It is especially deep on the far side of the stream as it under cuts the river bank and has scoured out a deep channel. I used the flood track across the top of the slip instead, longer but much safer. 

As always follow the golden rule of river crossings: if in doubt, don't cross...especially when there is a perfectly safe alternative.


Speargrass Slip and raised level of Speargrass Stream

Speargrass slip...the flood track skirts the  top of the slip!

Here is a view of the river from the top of the Speargrass Slip flood track, you go quite a way up the slope to get around it.


Speargrass Stream from the flood track above Speargrass Slip
After crossing the slip it was a series of gentle up and down sections all the way to the footbridge near Speargrass Hut. Your classic bog standard beech forest track....


Speargrass Hut Track: climbing out from Speargrass Stream to the hut

Speargrass Hut Track, typical standard of track


Speargrass Creek from the bridge near the hut, Nelson Lakes National Park


Speargrass Track: the footbridge just before Speargrass Hut
After 2.5 hours I arrived at Speargrass Hut which is one of the huts on the classic Travers - Sabine Circuit. The first question that popped into my mind was "Where is the speargrass....?" There wasn't any in the tussock clearing that I could see.


Speargrass Hut as seen from Speargrass Track...note the board walk!
Speargrass Hut is very nice, it is a serviced 12 bunker and is relatively new having been built in 2006. The hut is always full as it is a crossing point on routes to Angelus Hut, the Sabine Valley, Lake Rotoroa, the D'Urville Valley, Blue Lake, Waiau Pass and other points to east and west.

 It gets a lot of use, so it should probably be a 20 or 24 bunk hut.

Speargrass Hut (2006)

I had a chat with the American guy who was in the hut, he was heading up to Angelus Hut using the Speargrass Stream route. Reading the hut book the majority of visits were from people on the Travers-Sabine Circuit and TA hikers who couldn't get over Waiau Pass and had to turn back. 


DOC sign on the outside of Speargrass Hut, Nelson Lakes NP


I would imagine they get a bit of snow around the hut in winter as it is sitting at over 1100 meters.

Speargrass Hut: the sleeping platforms
I spent about 30 minutes at the hut eating my lunch and having a look around and then set off back to the Mt Robert car park. 

Speargrass Hut: the dining area...nice view out the window by the way!


I was kind of dreading the final climb from Speargrass Stream to Mt Robert car park. It was the last 30 minutes of a 6 hour tramp and it seemed like a long descent on the way in. Actually it was remarkably painless, in fact as I crested the last rise and saw the car park I thought "Unhhhh...is that it...?"

Speargrass Track: A footbridge over one of the un-named side streams

On the last uphill section of Speargrass Track
There are a few short sections of board walk on the Speargrass Track, there to protect areas of delicate alpine plants. I understand that there are extensive sections on the other side of Speargrass Hut as it descends Howard Ridge to Lake Rotoroa.

Boardwalk along the course of Speargrass Hut Track


Another section of boardwalk on Speargrass Track, Nelson Lakes NP
The track climbing to the car park is a 'root ladder', a type of track that is very common in Nelson Lakes NP.  they are slippery but ok to walk on if you take your time. 


Root ladder for a track, Speargrass Track

At the end of the Speargrass Track, Mt Robert end
If you are ever in St Arnaud you must drive up to the Mt Robert car park. It is well worth the effort as it sits at 900 meters and has awesome views down onto Lake Rotoiti, St Arnaud and the surrounding area.

Lake Rotoiti and St Arnaud from Mt Robert car park

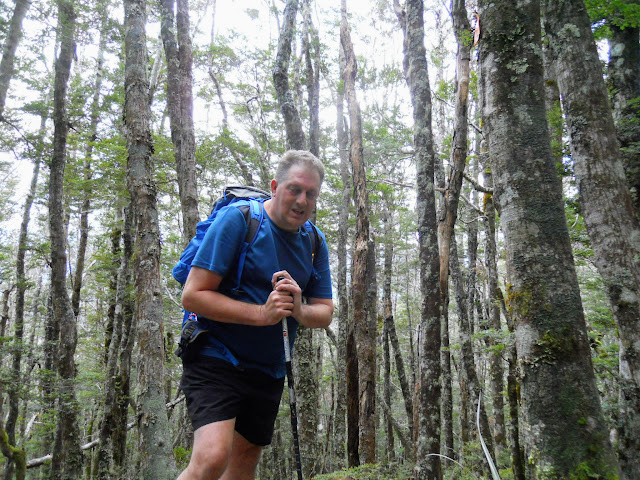
Jon at the Mt Robert car park


I stopped at West Bay on the way back to St Arnaud, you drive past it on the Mt Robert road. I used the lake to wash most of the mud and grime off my boots and gaiters and took some photos of the lake from near the dock.

Mt Robert Ridge from West Bay

Lake Rotoiti Peninsula from West Bay

Jon near the dock at West Bay, Nelson Lakes NP
Another great tramp on a nice bush track, and lunch at a awesome DOC Hut, really what else could you ask for! Speargrass Hut is the 89th DOC hut I have visited....I'm closing in on that hundy fast!!!

Access: Speargrass Valley Track can be accessed from the Mt Robert carpark, Lake Rotoiti.The obscure track heads off to the right from near the DOC track signs.

Track Times: It is approximately 10 km's to Speargrass Hut, or 3-3.5 hours.  Total tramping time is 6-7 hours return.

Hut details: Speargrass Hut (Serviced, 12 bunks, watertank)

Miscellaneous: Need to negotiate the Speargrass Slip (flood track available).

Tuesday, 6 December 2016

St Arnaud Range Track - Pancake Rocks: 2 December 2016

Walking to Parachute Rocks on the St Arnaud Range


I did something new last weekend and planned a "base camp" tramping trip to Nelson Lakes National Park. In effect, I stayed at the Kerr Bay camp ground and went for a couple of day walks over the two days I spent there. At night I slept at the camp ground, this is what you do on a base camp trip. This is something I plan to incorporate into my tramping program from now on.

Mt Robert from West Bay, Nelson Lakes NP


I arrived at St Arnaud on the Friday and after booking my camp site at Kerr Bay I went for my first walk which was to the Parachute Rocks via the St Arnaud Range Track. I had a few problems with my camera so there are less photos of the trip than normal. 

Camp ground at Kerr Bay, Lake Rotoiti, Nelson Lakes NP


LaKe Rotoiti and Mt Robert from near the entrance to the Kerr Bay campground (2018)

St Arnaud Range Track to Parachute Rocks

The track starts right next to the camp ground with a short section around the lake and then a massive uphill grind for the next 2 hours

Start of the track network near Kerr Bay, Lake Rotoiti

St Arnaud Track -Parachute Rocks route, Nelson Lakes NP
The first few minutes of this track are the same as the Lakehead Track I walked back in October, once you turn off there is about 20 minutes of mildly ascending track as you cover the forest along the fringe of the lake. Then it is a steep ascent to the bushline.

Be prepared, this track is ALL uphill!


Lake Rotoiti interpretive panel on Lakeside Track


Heading along the Lakeside track, Lake Rotoiti

About 10 minutes down the Lakehead Track you turn off and follow the northern end of the Loop Track, this eventually becomes the St Arnaud Range Track. It is well sign posted so you will not get lost. 


Turn off to St Arnaud Range Track, Lake Rotoiti

On the Loop Track heading up to the St Arnaud Range, Nelson Lakes NP


Mire or mountain swamp about 30 minutes up the St Arnaud Range Track, Nelson Lakes NP
The real climb starts after you cross Borlase Stream on the St Arnaud Range Track. This is an out-wash stream and I would imagine difficult to cross if it was raining heavily so bear this in mind if you decide to head up here in the rain. 

Crossing Borlase Stream on the St Arnaud Range Track, Nelson Lakes NP
St Arnaud Range Track: start of the climb to the Parachute Rocks

Jon near Borlase Stream, Nelson Lakes NP
The track for the next 1.5 hours is a series of switchback track sections; to start they are really long but gradually get shorter the higher you climb. The track itself is well marked but it is rough in spots and quite muddy, you also do a bit of clambering over roots, downed trees and rocks so be prepared. 

Start of the switch back sections of the St Arnaud Range Track
I left my gaiters at the camp ground and wished I had them with me because of the mud. That said, most of the people I saw were wearing mountain runners or hiking shoes so take your pick.....

Well marked St Arnaud Range Track along Borlase Stream


Resting near pole beech, St Arnaud Range Track, Nelson Lakes NP
The forest starts to thin out as you get closer to the bush line and the beech trees change into alpine tree species. You are under the forest canopy for the whole length of the track; it is only the last 100 or so meters (where you are in a tussock basin) that you get any kind of view.

Rocky, rooty section of the St Arnaud Range Track

It is hard to see in these photos but the gradient of the track is about 35-45 degrees...

Near the bush-line on the St Arnaud Range Track, Nelson Lakes NP

Eventually you make it to Parachute Rocks, which is a small rocky overhang just above the bush line. The views of Lake Rotoiti, Mt Robert and the Travers Valley are spectacular. You can even see large sections of Kahurangi National Park from up here including Mt Owen and the Thousand Acre Plateau.

There are a few bluffs around the rocks so take care where you are walking. 

Lake Rotoiti from Parachute Rocks, St Arnaud Range, Nelson Lakes NP

 The St Arnaud Range Track is STEEP and relentlessly uphill, this is not a technical track but it really wallops you. It is only 200 odd uphill meters from Parachute Rocks to the tops but I just couldn't do it, I was just too knackered! Another day, another trip.....

I sat near the rocks and had some lunch as I watched the almost non stop procession of people head on up the track. After half an hour I started off back down the way I had climbed.

Normally I find the downhill sections of a track like this more difficult than the uphill: your feet get crushed into the front of your boots but not in this case. The track quality is very nice and those switch backs make things easier on the down hill. 

Resting spot on the way back down St Arnaud Range Track

The trip down follows the same track and took about 2 hours in total, it is a slippery so I was walking slowly. This is not a place to slip and break your leg....they would need to carry you down the track as it is too dense for a helo extraction.

I stopped for a break about an hour down track and sat on a very nice log right next to the track. It was about 2 pm but there were still people passing me on their way up to the tops.


Back on the Lakehead Track, bound for St Arnaud,  Nelson Lakes NP

This is a nice wee trip but don't let its proximity to St Arnaud fool you. It is steep, alpine in nature and has a remote feeling to it especially higher up. There are a couple of hairy spots near Parachute Rocks that require care. If you are going up this track go LIGHT but prepared for cold, wind and rain. Take lots of water as there is none until you reach the tarns atop the St Arnaud Range.

The track is surprisingly popular, I must have passed close to 20 people during the day. Total time from start to finish was just short of five hours. 

Note: I later discovered that the SD card in my camera had malfunctioned so I only had the 40 odd photo internal memory of my camera to use. That is why there aren't more photos.


Access: St Arnaud Range Track can be accessed from near the Kerr Bay boat ramp, Lake Rotoiti, Nelson Lakes NP. Travel 20 minutes along Lakehead Track, then take junction on left of track.  The track is well sign posted and marked throughout.

Track Times: It is 2-2.5 hours to Parachute Rocks, another hour to the tops.  Total tramping time 5-6 hours return.

Miscellaneous: Steep track, one un-bridged side stream, fall hazard near Parachute Rocks.

Sunday, 13 November 2016

My tramping gear: Navigation, communications, survival, and first aid

My tramping survival equipment reviewed...


 I thought I would give you an idea of the type of navigation and safety gear I carry with me.  I have a small selection of tools to help keep me safely on track: my criteria (in order) is functionality, light weight and ruggedness.

  Navigation: GPS, compass and map

 Like many trampers I own a GPS unit, mine is a Garmin eTrex 20 GPS. It is a fairly basic unit but has the functions I require: GPS co-ordinates, way point setting, basic map/topographic information. What I generally use it for is fixing my location on a map and finding tracks in mist/heavy bush.

The Garmin eTrex 20

 When I first started tramping GPS units, as we know them now, did not exist. We had a GPS locator in my Army unit, it cost $20 000 and like the cell phones of the time weighed 1 kg & was the size of a brick. As a pleb, I was not allowed to touch it, let alone use it!

Remember this was before Desert Storm, the moment when GPS had its baptism of fire....

An early military GPS unit, the SLGR or 'Slugger"
In the Army I learnt to navigate using a prismatic compass and map, I think these are still fundamental skills every outdoor person needs. A GPS unit can break or the batteries can fail. If you do not have a back up compass, or do not know how to use it correctly you could end up in a world of hurt.

 I use a Silva Ranger compass calibrated for the Southern Hemisphere, yes there is a difference between a northern and southern hemisphere compass. It is "workman like" and does the job without too many fancy frills that can break.

The Silva Ranger compass

 For maps I have access to a program called Map Toaster at work (one of my few perks....), I just print colour copies of the maps I need and either laminate them or carry them in a plastic zip lock bag.

Topographic map in a Ziploc bag


I have also been using the free maps available on the Topomap website. Just a point: if you are using Topomap add the longitude and latitude markers as these are not shown when you print them out. Got myself in a spot of bother not doing that one time....


Topomap page view...note how the maps were loaded on a bit of an angle.

  This works for me.....

For a master class in using map and compass to navigate check out Ashley Burkes website. This is an Australian site but the information is also relevant to New Zealand conditions. 

Communications: Smart Phone

  Yeah...Ive got a smart phone, although I seldom if ever carry it with me on the trail. It is a Samsung Galaxy S3 and because it is a smart phone I have downloaded some useful apps. I have a digital compass, GPS locator and map software loaded which all work without cell coverage. 

Samsung Galaxy S3


I'm not a massive fan of phones, in fact I have only had a smart phone for about 10 months now.....I just don't see the point really.

(Jon you dirty Luddite...wash your mouth out!)

Survival Equipment:The Emergency Kit

Everyone should build themselves an emergency kit containing the vital equipment you need to keep yourself alive for a couple of days. I carry this kit on my body whenever I am separated from pack i.e. if I drop pack to take some photos or have a "comfort stop". 


My emergency survival kit

My emergency kit includes:

  • Fire Starting materials: 4 waterproof matches and a small mini "Bic" lighter + cut up inner tube as a fire starter. 
  • A cutting tool:  A small folding Gerber knife.
  • Signalling: In my opinion you can use the tin lid itself for signalling. 
  • A small whistle
  • A button Compass
  • Duct Tape:  I wrap a couple of metre's worth around my walking pole.

Example of duct tape wrapped on trek pole

  • Needle & Thread
  • Note Paper & Pencil
  • Wire
  • Safety Pins
  • Fishing Hooks
  • Flashlight
  • Water Purification: 4 x Aquatab tablets
  • Medical Supplies:4 Band Aids, 4 Panadol and 2 Antihistamine tablets
  • Random Items: Salt Pack,  Sugar Pack,  Paper Clip,  Barley sugars
  • A tin to hold it all, mine is an old Altoids tin from the US, it needs to be light weight.
     
Go and read my previous post to see how to make a kit and how the elements are used.....

Survival Equipment: Personal Locator Beacon

 This has been covered in a previous post, suffice to say I own and carry a Personal Locator Beacon or PLB. A PLB is a electronic device which can send a distress signal to an satellite network, a message is then sent to your local rescue services. People have been rescued in under an hour using a PLB, but the usual response time is 3-6 hours.

My PLB in its waterproof Sil-Nylon bag

I think every outdoor person should own a PLB, in an emergency it could be the difference between life and death.

ACR ResQlink PLB


My PLB is a ACR ResQLink, it cost me $600 two years ago and IMHO is worth every cent in terms of security of life. The battery in mine lasts until 2020, at that time I will need to send it away for a replacement battery which normally costs about $200.

The beacon and the neoprene flotation pouch you get

Note: I have a color coding system for the stuff sacks containing my gear:
Blue = Clothing
Orange= Safety/survival gear
Green= Cooking/food preparation
Yellow= Food/snack items

Register your Locator Beacon with Beacons.org.nz  registration is free and takes all of 3 seconds. If it is not registered it will still be notified, but it can take an additional 12 hours for the messages to get through to New Zealand Rescue Services as the satellites are U.S. owned.


Survival Equipment:Fire starting kit

I always carry a small fire starting kit, this is a small plastic bag with water proof matches, a striker, cut up inner tube and fuchsia bark. Inner tube wrapped around dry twigs makes an awesome fire starter and super light fuchsia bark is the best native tinder I know of. 

Bark on a native New Zealand Fuchsia tree

I grab handfuls of bark every time I pass a fuchsia tree and dry and bag it for future use, I probably have about 2 kilos of it. Fibre waste gathered from the filter on your clothes drier is also a good option.

Survival Equipment: Ancillary Gear

 When you go tramping you should ideally have some form of shelter with you in case you find you cant quite reach your hut/car/home before darkness falls.

This is what the old timers call being "be-nighted".  

I ran out of time: Fly camp set up on the side of a  track
If I am doing an overnight tramp I will be carrying a sleeping bag, air mattress and either a tent or fly sheet. On a day tramp this would be too much to carry - but you still need some shelter.

The SOL breathable Bivy Bag

On day tramps I carry a SOL Escape Bivy Bag and a plastic pack liner to provide materials for building an expedient shelter. The SOL Bivy is made of a waterproof, heat reflective material (think space blanket) but has the advantage of also being breathable. I would put some branches/tussock/pine needles etc. down to insulate me from the cold ground and climb inside the bivy.

SOL Bivy looks something like this in use.....


 I would use the man sized pack liner and the 2 meters of lightweight tent cord I carry to fashion a shelter that keeps the rain off my body.


Lightweight tent cordage


This expedient shelter in concert with my wet weather/warm clothing would be enough to stave off hypothermia in all but the worst weather conditions.


Pack liner used as a makeshift shelter
  
It would not be a comfortable nights sleep by any measure but at least you would survive.

First Aid kit

  There are many fine pre-packaged first aid kits on the market but I actually think it is a good idea to build your own. Building your own allows you to customise it to suit your style of tramping.

A typical commercial trampers first aid kit

 Once when walking a Port Hills track I fell and injured my elbow and my leg: all I had to assist me were half a dozen plasters and it was not enough. Since then I carry comprehensive supplies any-time I am walking or tramping. 

I do a lot of solo tramping, for this reason my first aid kit is bulkier than those other trampers carry. The first aid kit weighs 180 gms and is packed in a waterproof bag.

My First Aid kit removed from its protective bag


Bear in mind the worst thing I usually have to cope with are splinters, blisters or a small cut/abrasion. I'm not performing life saving surgery, I lack both the supplies and skills to do so.


My first aid kit contains:
A triangular bandage
 a selection of plasters, band aids and medical tape
 2 blister plasters, 3 antiseptic wipes
 2 x 2m gauze bandages, 2 x gauze pad
 a prepacked suture kit
 a phial of saline solution
 anti histamine tablets, paracetamol, Imodium tablets, water purification tablets
 examination gloves, tweezers, scissors,  a needle, 6 small safety pins (I once assisted someone using safety pins as sutures on a injured tramper...no....no... it was not pleasant!)
  a mini Bic lighter.
a CPR card and small first aid sheet

Contents of my First Aid kit


This covers all of the minor injuries/ health issues you face on trail, if I need more gear than this I would require a rescue helicopter....it would be time to fire up the PLB!


So there you go, a quick glance at my safety/survival equipment.