Showing posts with label Tramping Equipment. Show all posts

Tuesday 31 March 2015

My tramping gear: ACR Res Q Link 365 Personal Locator Beacon

My Personal Locator Beacon

I usually carry a Personal Locator Beacon or PLB with me when I'm out tramping. Up to now I have been hiring one for each trip but I have finally managed to save enough shekels to buy my own.

My ACR 365 Locator Beacon

I brought myself a ACR ResQLink PLB so that I will always have one with me when I'm out tramping. In basic terms, PLB use a satellite network to send a distress message to your local Police force who then coordinate any Search and Rescue operations.

ACR ResQLink 365 PLB


 These are the same used by the Southland PLB Charity and are one of the brands recommended by New Zealand Search and Rescue (SAR). The cost was $550 from the Hunting and Fishing store here in Christchurch, this was $50 cheaper than any other domestic supplier.
That's one of the reasons everyone doesn't own one, they are bloody expensive!


Instructions for use on the back of the ResQLink PLB


I think most people recognize the usefulness of carrying a PLB, especially if like me you do a lot of solo tramping. Although it is not a "get out of jail free card" it does give you a small measure of added safety in the outdoors.


Update: September 2021


I replaced this beacon with a later model in September 2021 as the battery in my old unit has expired. My new beacon is another ACR ResQLink this time a model 425 with a digital screen. 


My new model 425 ACR ResQLink beacon...


Hopefully I never have to use it as I never had to set off my old beacon in the six years I had it. 

Thursday 8 January 2015

Hiking Shoes vs. Hiking Boots: My personal thoughts on this discussion.

Sandals, shoes or boots: what to wear tramping? 


Hiking/tramping footwear comes in a plethora of shapes and sizes. Hiking shoes, hiking sandals, cross trainers, mountain running shoes, different brands and different versions – the options are mind numbing to contemplate!

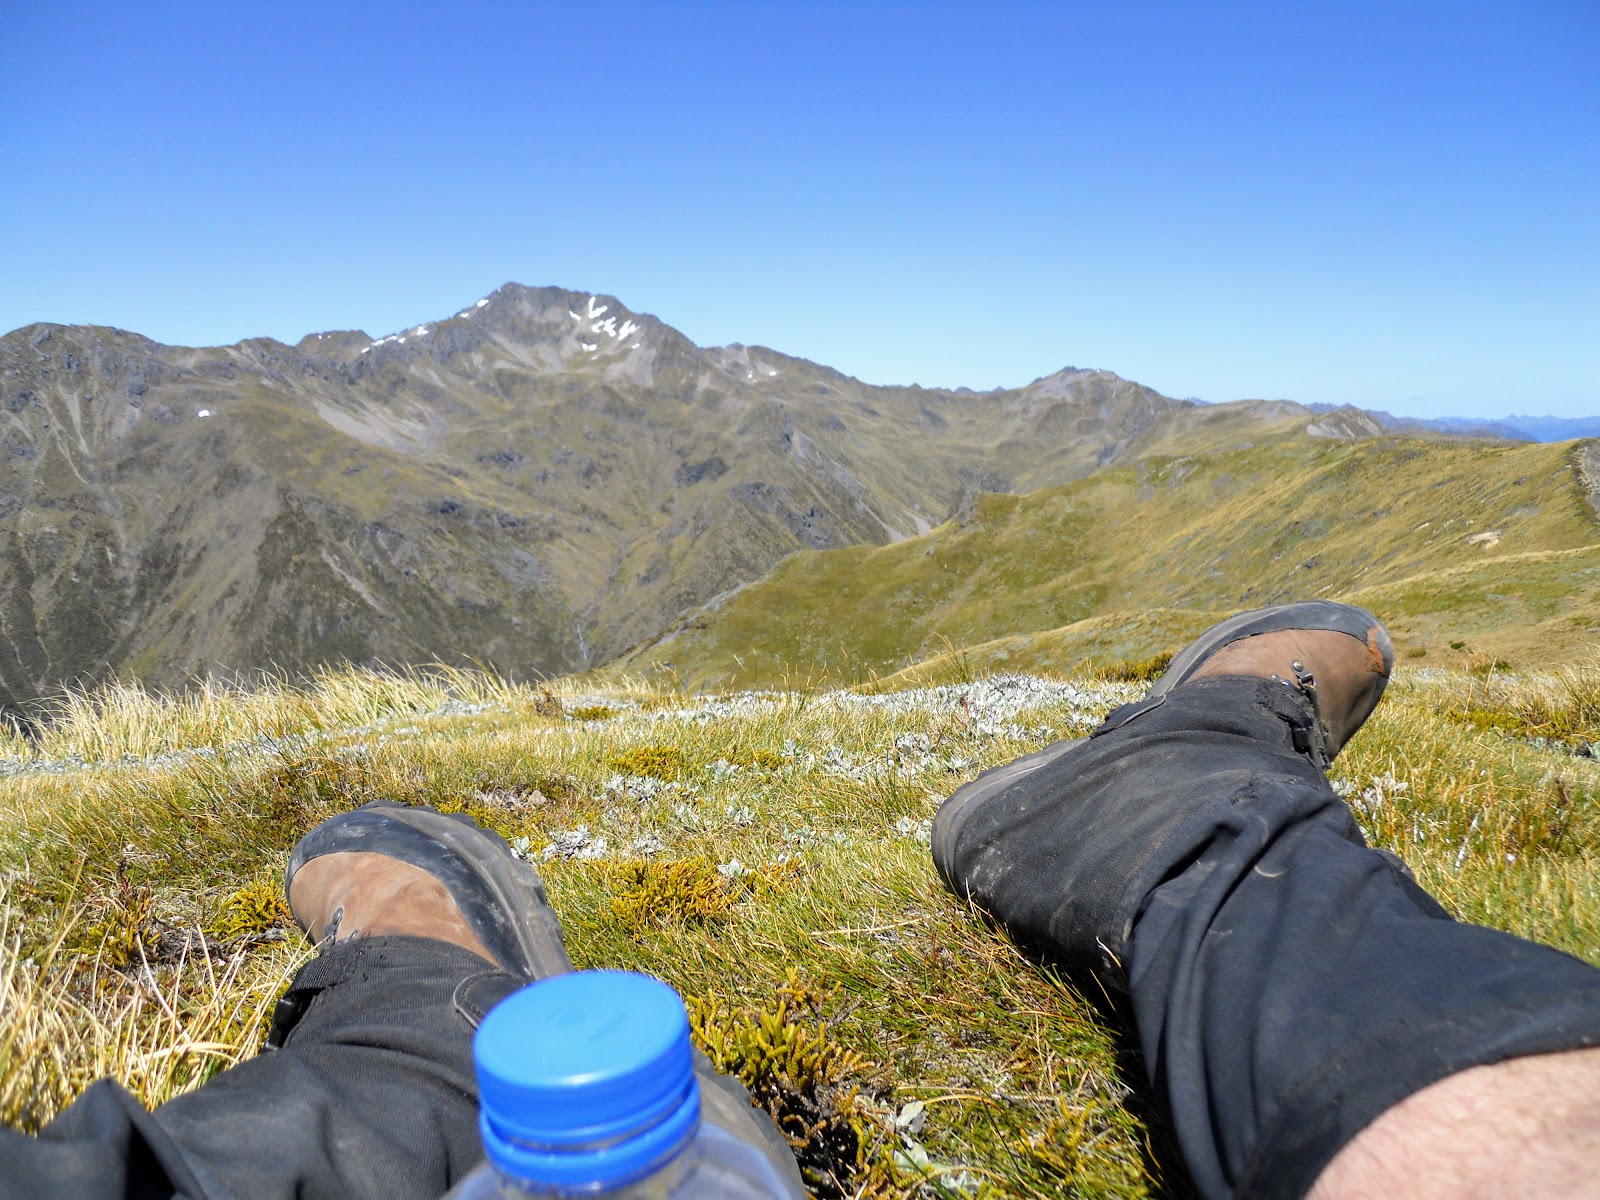
A day hike to the Bealey Glacier in my Lowa boots....

What are the differences? When are boots better than shoes and vice versa? Is it worth the price difference to buy boots? We’ll start with some basic features of each and then elaborate on which conditions demand which type of “boot”.

Hiking Sandal

It may come as a bit of a surprise, but hiking sandals can be a great option for a casual hiker. Sandals are light, which means you aren’t going to expend as much energy moving your feet over the course of the trip. They are perfect for water crossings or as camp shoes. Many people prefer a sandal with some kind of toe guard to help protected against rocks and roots.

Keen Newport H2 sandal


Hiking sandals are best used for short well maintained trails or as a lite back up when their primary boots are temporarily out of commission. An example would be the Abel Tasman Coastal Track during summer. Nice, well graded tracks, a lot of tidal crossings, warm weather conditions.

For perspective, some chap walked the whole 3000 km Te Araroa Trail in sandals a couple of years ago, so just walking the Abel Tasman would be luxury...ay, sheer luuuxxxurriiieeeee!

Naresh Kumar walked the whole 300 kilometer Te Araroa Trail in sandals


Look for sandals with similar features to most good hiking shoes: tough stitching, quality materials, tough soles (Vibram if you have a choice), and good arch supports. Keen are one of the major brands for sandals, I own a pair of their Newport H2 sandals and they are rugged and comfortable to wear.

Trail Shoes or Hiking Shoes

Trail shoes are all the rage in long trail communities due to their compromise between comfort and functionality. They are sturdier than your average running shoe because of their thicker soles and leather reinforced fabrics while at the same time are lighter and more comfortable than standard tramping boots.
La Sportiva Lead trail shoes


Because of their versatility, trails shoe styles have started to become part of a more mainstream fashion. Be sure to double check standard quality measures such as stitching, arch support, waterproofing, and lace design so as to avoid buying shoes that look like trail shoes but don’t function the same way.

Good brands include: Salomen/Innov8/La Sportiva/Salewa/Merrell/Asolo

Trail Running Shoes


Trail running has exploded in popularity in recent years. Shoes designed specifically for trail running are similar to standard trail shoes with a few subtle differences.


Asics Sonoma,  lite mountain trail shoes


 Most trail running shoes have a bit more padding, tough soles, and slightly more ankle support. These shoes can be quite expensive, so if you aren’t planning on running up the mountain, you can probably go with a standard trail shoe.


Good brands include: Innov8/Salomon/Asics/La Sportiva/Hoka

Mid-weight Tramping boot

Many people would just call this “a hiking boot”. A mid weight boot is what most people think of when they think of tramping footwear. They will have extra ankle support, stiff foot support, and a reinforced leather or synthetic outer layer.

Synthetic Salewa Mountain Trainer Mid


They are versatile and rarely feel like overkill on a trail of moderate difficulty. Sure, they will be a bit heavier, but unless you are using them on a multi-day, long term trek, you probably won’t even notice. Don’t forget to look for the signs of quality: a toe rand, good quality soles (Vibram is best), quality inner soles and a Gore-Tex inner lining if that is your thing.

Leather Vasque St Elias GTX boots

Remember to give yourself time to break in all new boots. While modern boots take significantly less time to break in than old style all leather ones, you should still dedicate at least three to four days to breaking in your new boots. I wear mine to work for a couple of weeks, this usually does the trick.

My daughter in some Lowa mid weight boots


Good brands include: Salewa/Vasque/Asolo/Lowa/La Sportiva

Heavy Boot

Unless you plan on spending a significant amount of time out in the bush where there are no fixed trails, it is hard to justify a heavy boot. The heavy boot is therefore much favoured by mountaineers, hunters and bush bashers.

If you do fall into the category of hard arsed bush pig, then you know that a heavy boot can be your best friend.

Lowa Tibet GTX


A good heavy boot should feel like a cross between mountaineering boots and a hiking boot. They should provide extra grip with knobby soles and be crampon compatible. The ankle support should not only protect your ankle from twisting but also protect your lower calve area. Expect to see above the ankle lacing and a full rubber rand to protect against rock cuts.

Me wearing some Lowa Tibet boots on the Travers-Sabine Circuit in 2017


Of course, for all of this protection you pay a price. Heavy boots are, well, heavy! In fact they can be god-damn soul destroying heavy if you are walking a long way. They are also expensive, most are European made and you will not see much change from $600-$700 dollars.

Meindal Bhutan MFS boots


 Don’t expect them to be super comfortable either. These kinds of boots are designed for hard work and will be overkill for anything else! Think combat boots: you are the soldier and nature is the enemy...vanquish it with your colossal boots!

My heavy weight Lowa Tibets..note size 14 feet!!!!


Some well known manufacturers include: Haix/Lowa/Meindl/Carrimor/La Sportiva

When do I need hiking boots?

When trails are particularly rocky, covered in roots, or are made uneven by other objects in the trail.
When the trail is wet/very muddy.
When there the possibility of rolling your ankle is high.
When trails are exceptionally steep.
When hiking in the snow.

e.g: walking up the Joe River to the Olivine Wilderness area, crossing Waiau Pass, hunting in Fiordland

Boots are useful in muddy conditions.....
...boots are also suited to those rocky alpine areas like Mt Travers...Waiau Pass etc.

When will hiking shoes be OK?


Well maintained even trails
Day hikes
Trail running
Camp sites

e.g: Most of the Great Walks, The Queen Charlotte Track, most of the Te Araroa Trail, Te Ara Pataka

The Queen Charlotte Track can be walked in trail runners....


When will sandals do the business?

Well maintained trails, in warm weather.
Short beach walks.
River journeys
Camp sites

e.g: The Abel Tasman Coastal Walk, the Wanganui River Journey

The Able Tasman Coastal Walk is sandal friendly....in summer...


What about Jon's footwear? 

What you may ask does Jon wear on his feet: good question!

Jon Tramping: boots and gaiters on the Lewis Pass Tops, these are La Sportiva Valojets


I have used all these types of footwear at one time or another, starting with full leather ex army combat boots and going right down to trail sandals. I seem to be going lighter as I get older, lunking about in those kilo a boot combats just don't appeal like it once did!

Currently I am wearing sandals, trail shoes and mid weight boots.

La Sportiva boots on the QCT in 2016


I use Keen Newport H2's as my hiking sandals, wear Asic Sonoma's for walking and some day walks and have Lowa Ranger III as my leather mid weight boot. I also have a pair of Lowa Tibet calve high boots for serious tramping in alpine and rocky river bashing areas.


Wearing my Lowa Ranger boots on MacKinnon Pass, Fiordland in 2018

My foot in a Lowa Tibet boot up the Waimakiriri River Valley in 2018

Wednesday 10 December 2014

Wilderness Survival Kits: Make an outdoor survival kit

One kit to save them all...

A popular challenge within the outdoor community is to build a small and thorough Survival Kit.  Building a kit of this type is an interesting project with some very valuable rewards. First, it’s fairly inexpensive to build. Second, it puts you in the survival mind-set and forces you to think creatively about how and what you need for surviving. The small size of the kit helps you get your priorities straight real fast. 

Using the kit

Small survival kits are perfect for carrying at all times.  They are small & lightweight and fit in a small bag or jacket pocket. If you are going on a day walk or you take your pack off carry your survival kit with you. I chuck mine in my pocket EVERY time I walk more than 5 metres away from my gear.

My lightweight Survival Kit

I have use an old Dunhill cigarette tin, but any small light metal tin will work. I have sealed mine with insulation tape. The kit needs to be sealed to stop water getting in, you only open it when you have an emergency.

My wilderness survival kit

Below are my general thoughts about the main contents of the kit:

Fire Starting:
I like to pack at least 2 methods for starting a fire. I packed in 4 waterproof matches and taped a match strike strip on the underside of the lid. I also packed a mini "Bic" lighter and 2 different types of tinder – 1 cotton based and some old bicycle inner tube.

Cutting Tool:
A sharp blade is useful:  a small folding knife, a razor blade or small Exacto blade. I have a small 27 gm Gerber folding knife in mine. For it’s size, it is a very solid and reliable knife. It’s perfect for many typical camp/survival/bushcraft chores. I have also taped a box cutter blade to the lid of the tin.

Survival kit contents: Gerber Paraframe I


Signalling:
In my opinion you can use the tin itself for signalling. It’s not quite as shiny as a mirror but should do just fine. Just buff up the inside silver a bit and you’re ready to go.

Whistle:
I have a small survival whistle in my kit which I received free with a first aid/survival kit I brought for my car.

Survival whistle similar to my own


Compass:
This is an important item, you should pack a small compass! You can often find one of these on a cheap key chain or purchase one.  Mine came free with a Vaude pack I brought in 2014.

Free Silva button compass


Duct Tape:
Very useful survival tool for cordage or random repairs to everything. You can tear it into strips to add length. I wrap a couple of meter's worth around my walking pole but also have a small rolled up length in my survival kit.


Survival kit contents: Duct tape wrapped around trek pole


Needle & Thread:
Use these for clothing or gear repair. Pack a strong nylon thread – it can double as fishing line, snares or other cordage needs.

Thin Wire:
Think picture hanging wire thickness...you can use this for snares, repairs and many other applications. I have about 1.5 metres in my kit, I wrapped it around 3 fingers and then tied it off to take up less space. 

Picture hanging wire...$7 NZD for 7 metres at local store


Safety Pins:
Can be used for temporary clothing/gear repairs and as an emergency suture (ouch!!!...I have had to do this on someone before...not pleasant!). 

Safety pins: fish hooks, clothing/gear repair and suture all in one!


Fishing Hooks:
Self explanatory – you can a pack a few sizes for birds/fish, etc…you will probably never use them but they are a worthwhile addition.

Flash-light:
A compact button LED light is a good addition. These are bright and cheap, they also last a long time. Some people prefer to pack small candles.

Water Purification:
You can boil water in the tin itself. I prefer to pack 4-6 chlorine tablets. It takes 1 tablet to purify 1 litre so 4 tablets can purify 4 litres of water.


Aquatabs: Chlorine based water purification tablets


Medical Supplies:
Adhesive bandages are small and easy to pack. I also pack 2 pain reliever pills and alcohol wipes for disinfecting a cut/wound.

Note Paper & Pencil:
You never know when you need to leave a note. I bought a pad of waterproof paper and cut it to size to fit my tin. Also added a small HB pencil to write with.

Other Random Items:
Salt Pack – take with water to fight dehydration.
Sugar Pack – take for quick energy
Paper Clip – use a binding/button/hook/light weight 'biner etc…
Barley sugars– quick energy (or some other hard candy)
Medication – any necessary medication you need

Classic fare: Heards Barley Sugar


The Tin Container Itself:

The tin itself is both a container and part of your survival kit. You can use it: 

  • to make char cloth
  • as a drinking/cooking/boiling container
  •  as a signal mirror


There are countless other items to consider packing in a mini survival kit.  As long as the key survival bases are covered, your creativity is the limit.

  These are suggested guidelines only…there are no right and wrong contents. If you think it is important then add it, just try to keep it lightweight.

Remember....it’s YOUR kit.

Tuesday 18 November 2014

Camp Footwear: Is this the perfect camp shoe?

A tale of camp footwear...or footwear for camp!

Wearing your tramping boots/shoes 24/7 while tramping can lead to many foot problems. The damp, warm conditions are ideal for blisters, chaffing and a number of fungal foot conditions. Once you arrive at your destination you need to remove that wet footwear, but what should it be replaced with? Your choice is simple: either nothing, socks or some other kind of footwear.

Jon sans boots in Nina Hut, 2017
Personally I love getting into a hut or camp and slipping off my boots to let my feet breath au natural. Not the nicest thing for other hut mates though, and your feet will get dirty and cold. Socks...much the same so the main solution is another kind of shoe.

Camp shoes for evening attire

I find it hard to quantify exactly what I am looking for in a camp shoe... always I have been unable to balance weight, utility and comfort.. I have experimented with a number of different types: shoes, sandals, jandals...
From classic Kiwi jandals...

I've even tried Crocs (knock off's, not the real ones, real Croc's cost $70+ in New Zealand...). None were 'quite right'.
...to knock off Croc's


I think that may have changed, introducing my new camp sandal: the Bedrock Gabbro Lite:

Bedrock Grabbo Lite

The Bedrock Gabbro Lite is super light (just 116gm) and has a quality Vibram sole. I first saw these on an American hiking site I visit, and thought they looked like a good solution. You are able to buy both replacement soles and straps for these sandals which is a great innovation.If it is cold or the bugs are biting you need to team these with toe socks.

Bedrock Gabbro Lite

I brought a pair off Amazon and had them shipped to New Zealand for a very reasonable price. I took them with me on my last trip to Hawdon Hut and they performed well: they are hard wearing, stiff enough and light to carry.

Obviously,  these type of sandals offer no protection to your feet at all, so wear your boots/shoes when cutting wood etc. Many is the tale of the chopped up foot clothed in a flip flop...just don't do it!

You can of course forget about camp footwear but then you are liable to get cold, dirty feet and the ground is often rocky or hard. Not great when they are your only means of transportation.

You should check out the website for Bedrock gear

Monday 1 September 2014

Tramping Equipment: My summer and winter sleeping bags

New winter weight sleeping bags for Jon


I've been saving my shekels so I could buy myself a 3-4 season sleeping bag. I have Summer and Base Camp bags but needed one for winter and the shoulder tramping periods from May-September.

My summer sleeping bag: Domex Packlite (large size)


I wanted a down bag as I will be mostly in huts over these periods and they are so much warmer and lighter than comparable synthetic bags. Alas, they are very expensive, with prices ranging from $400-$1200 depending on brand and what type you buy.

The Macpac Escapade 700 XL

Recently Macpac had a 60% clearance sale so went down for a look at their wares. Macpac is one of the better New Zealand outdoor clothing and equipment firms. I brought one of their Escapade 700 series sleeping bags for a very reasonable price. Normal retail is $540 but on sale I managed to buy it for only $275.

Macpac Escapade 700 XL

XL sized for comfort and fit...

 The bag is an extra long, dimensions are 242x86x56, weight is 1.3kg. The outer cover is Pertex with a 80/20 blend of duck down as the filler. The loft rating is 600, which means it should be good for temperatures down to -2 degrees Celsius. 


Big Blue Escapade at Nina Hut, Summer 2016

With my silk bag liner and the addition of thermals as sleep wear it should be good to -6 or-7 degrees at least. One good feature is the ability to unzip this and use it as a quilt, which is what I often do over the Summer. 

Escapade 700 XL
Being realistic, buying a $1000 ultra light sleeping bag just isn't on my books, that's more than I spent on gear, food and trip cost for ALL of last year. This is not the cheapest, lightest, smallest or warmest down bag but I think it has a fair mixture of all those attributes. 


Update 2017: I have been using this bag for a couple of years now and have few complaints about it.  This is a high quality bag which fills its role well, it is now my 'go to' bag. It packs down to reasonable size, it is roomy and for around the same weight as my Packlite is immeasurably warmer.

My Escapade in Mid Robinson Hut, 2015


The Escapade on a trip to Magdalen Hut, Winter 2017


The Escapade is good but I'm currently researching sub 1 kg down bags as I transition to ultralight tramping gear.

My Te Araroa Trail sleeping bag


I'm section walking the Te Araroa Trail so I wanted a much lighter sleeping bag to fill the niche for those kind of trips.  Late last year I took advantage of a sale at Bivouac Outdoor to buy a lighter weight down bag.

My new sleeping bag is an Exped Lite 500, weight is 970 grams, temperature rating down to -4 degrees and packs down to a smaller volume than my Macpac bag.

My new Exped Lite 500 at Speargrass Hut, March 2018


Here is a blog post about my Exped Lite 500.

The Exped Lite 500 down sleeping bag


This has now become my defacto go anywhere bag.

Sunday 27 July 2014

Tramping Equipment: La Sportiva Valojet boots

New boots for new adventures...La Sportiva Valojets

I've recently brought myself a new pair of leather boots for the coming Summer tramping season. I have been wearing a pair of Kathmandu boots but as is the case with their gear they have started to fall to bits.  

My Kathmandu Barrigan boots in 2017

La Sportiva Valojet Boots

These boots are La Sportiva Valojets, a medium weight leather boot with a Goretex liner, the sole is a good quality Vibram one. The last fit is for wide feet...many of these European boot makers seem to have very narrow boots so finding some quality boots that are wide is a real bonus.

La Sportiva Valojet boot

La Sportiva is a well known Italian boot manufacturer better known for their plastic mountaineering boots but the reviews for their trail boots are very positive.

I know a lot of trampers are going away from boots and wearing trail shoes, mountain trainers or their ilk, but I actually like a pair of hard wearing leather boots on my feet. I find them more supportive and hardier on the rocky trails and river beds which characterise the Canterbury region.

My Valojet boots on my feet at the beginning of the walk to John Heyward Hut

 Specifications for these boots are:
  • Upper: Greased Full grain leather upper 2,4 mm
  • Lining: Gore-Tex®
  • Insole: Graded 5 mm Nylon + shock absorbing upper layer
  • Sole: Vibram® with Impact Brake System+ PU midsole
  • Sizes: 38 - 48 including half sizes
  • Weight: 1.550 kg per pair

Vibram soles for long life

Vibram soles are the bench mark for quality on tramping boots, they are hard wearing and technically advanced. I also like the high rand on these, good for protecting your boots from rock scuffs etc.

La Sportiva Valojet boot, Vibram sole

Choose your boots wisely...

Tramping boots are really expensive, good ones go for $400-$700 a pair. I had originally placed these boots on my wish list but removed them because they normally retail for $600.
There was a sale at one of the local outdoor stores which saw me walk away with these for the bargain price of $350.

 
My Valojets on the Lewis Pass Tops, December 2015

Here's  hoping they are a successful purchase.

POST SCRIPT: I've worn these on many trips now and they have performed very well. They are really grippy in wet conditions, nice firm sole, and fit well in the ankle area. 

I've switched to slightly thinner Smart Wool socks as my thicker Munds/Bridgedales are too much sock for these boots. My toes were getting constricted in the front of my boots because of the thickness of my socks.

Wearing the Valojets on the QCT in 2016

Wearing the Valojets on the track to Hope Halfway Hut in 2017

I love these boots and would buy more but unfortunately they are now out of production...a pity as they are excellent boots for New Zealand conditions.